3D Printing Workflow for Practical Film Effects

With the advent of 3D printing, practical effects have begun to make quite the comeback. What used to be industry standard has gone from obsolete to a specialized type of work, often sought by directors that want to give their films an “authentic” look. From costumes to sets, 3D printed elements allow for new authenticity in special effects. In a January issue of “3D Artist”, Nathan Crowley, production designer for the movie “First Man”, explained the use of 3D printers in creating spacecraft for the big screen. “We had 18 3D printers in the art department which literally ran 24 hours a day for six months…”, he says. I figured the time had come to give our readers a quick tour of the New Flight Digital 3D printing workflow.

The Ender 3

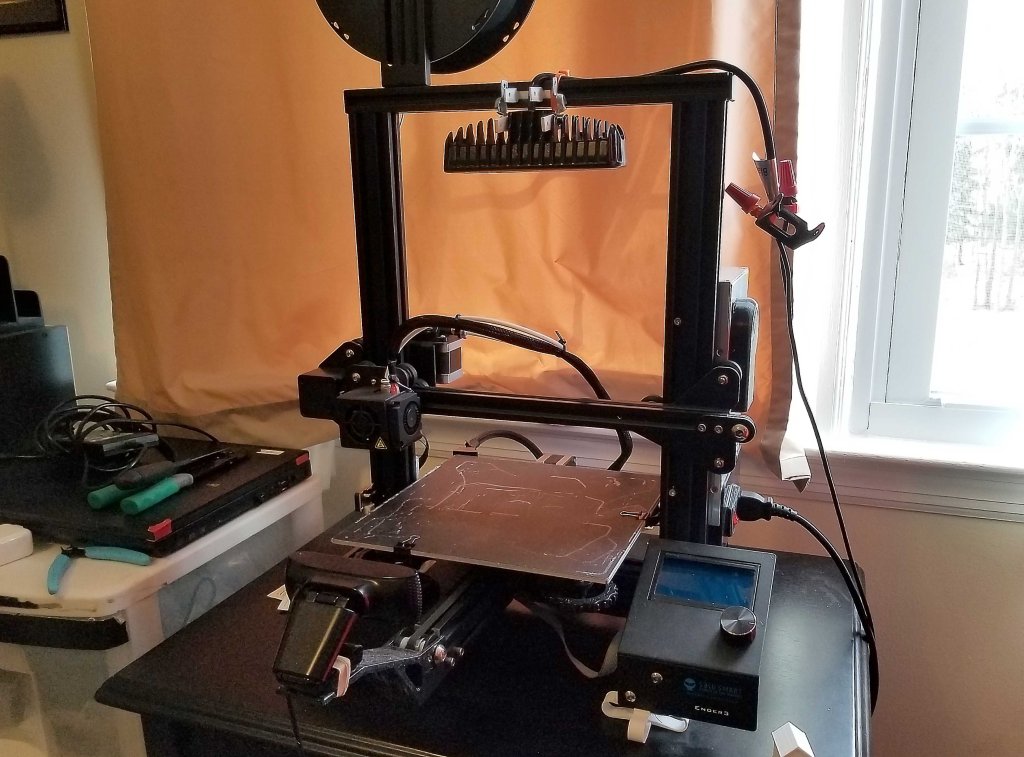
At the heart of our workflow is the Ender 3, a cost effective 3D printing workhorse with a variety of benefits in the practical effects production area. I use this printer to create small sets that are typically used in custom animation scenarios in which a practical miniature set is needed. I print at a layer height of 0.08 mm. Controlling my printer is a Raspberry Pi running OctoPrint, a free program designed to make printing over a network easy. This allows for easy access to the printer in different physical areas. Temperature and other aspects can be monitored and controlled through the web interface.

Along with the Ender 3, I have set up a powerful LED lamp connected to a network-controlled relay module. This way, I can turn the light on and off via the relay module’s web app. Also running on the RPI is a webcam stream of the printer for easy visual monitoring remotely.

I have been using this printer often as a “clone” tool for some 3D objects; that is, using photogrammetry, I have been able to print small copies of real-life 3D objects. The process is quite simple, but allows for sets and models of real-world locations to be built for tabletop practical effects.
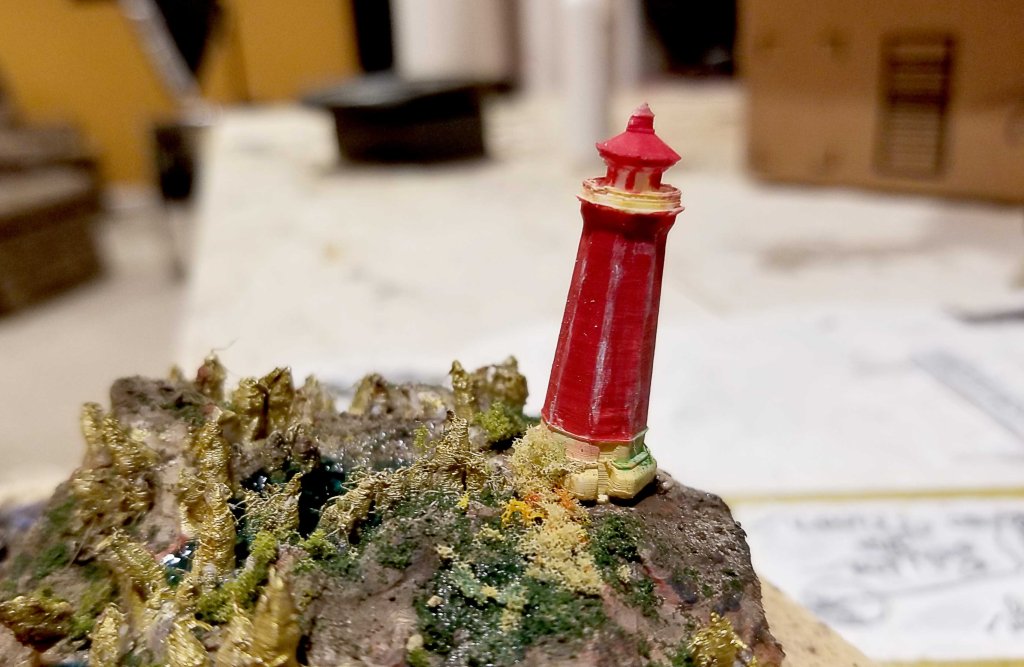
Russian visual effects company “Scandinava” has been very successful in their usage of physical models and visual effects. Combining the two, the group is able to produce incredible looking visuals that would take insane levels of computing power to recreate digitally otherwise. Check out their Instagram at www.instagram.com/scandinava .

All in all, I am excited for the new year ahead, and all of the great opportunities I will have to continue producing practical effects using 3D printing and other emerging technologies.

Motion Capture for Music Videos: Update #1

Over the course of the past two days, I have had the pleasure of working with the Shadow Motion Capture System to create motion capture data for characters, which will be featured in a music video. The music video takes place in a swamp, for which we are creating some creepy practical effects using a diorama. As such, the “people” performing the music will be swamp animals, created with animation and mocap data. 

Practical Effects created with a Swamp Diorama
On set with the “Gods of Fire” during a mocap session

Without giving too much away, a frog will be singing the song, while other animals such as raccoons and lizards play the rest of the instruments. The mocap suit requires several sensors to be placed over the shoulder blades and on the chest, which often come loose during rock-out sessions. This was our biggest challenge, but we overcame that before long once we determined how to best fasten the sensors. The mocap suit transmits a 5Ghz wifi signal back to a laptop running the latest Shadow software, allowing us to record the data. To begin, we needed to have the actor strike a “T” pose, with his legs together and arms out like a T. This allowed the sensor to calibrate and determine the orientation in that pose. Once the software knew the orientation in that pose, it could determine the orientation in any other pose. 

We experienced small problems with the device, but nothing too significant. For example, the device comes with foot pads that go in the user’s shoes. These pads sense pressure, and therefore, determine whether the user is in the air or not (during jumps). Since our talent was rocking out, he would often perform mini jumps in enthusiastic dance. These jumps were not enough to “trip” the pressure sensors, so they did not know the user had left the ground for a moment. As a result, the mocap figure preview on our computers would slowly slip downward as the sensors de-calibrated. The solution, of course, was to cut the jumps and replace them with other enthusiastic movements. Below, you can see our entire broadcast from yesterday when we recorded the mocap data:

All in all, the mocap session was a success. I exported each session as a BioVision Hierarchy (.bvh) file, and imported them into my favorite 3D program, Blender. To make the 3D models of the animals move, I used a plugin called MakeWalk, from http://www.makehumancommunity.com. The plugin takes BVH data and retargets it to a separate rig. To start, I produced a BVH rig for the animals using MakeHuman. The rig is one that MakeWalk can understand (since they are sister applications). I then edited the rig to fit the curvature of each animal, and then applied it to the model using automatic weights. This means that each “bone” in the rig affected a part of the model in a way that the application determined automatically. I then edited the automatic weights to better reflect the animal’s anatomy (for example, the upper arm bone should move the whole upper arm, etc.) After this, I retargeted the rig to a .bvh file recorded on set, and voila! The rig and model moved and acted just as our talent had on set. Last step was to apply “corrective smoothing” to the model to correct some bumps that inevitably form as a result of the mocap warping.

As I work on the mocap data and refine it, I will be posting more updates. Stay tuned for more… including a singing frog! That will require facial motion capture. I will be using a technique that I invented myself, and I will describe it in a future post.

If you have any questions, don’t hesitate to reach out to me at contact@newflightdigital.com.