I got inspired a few weeks ago. You may have heard of a CG artist by the name of “Beeple”. His real name is Mike Winkelmann, and… well… he’s been creating one scene in 3D every day for the last 13 years! Seriously. He uses Cinema 4D primarily, and he puts out a ton of awesome work. You may even be familiar with some of it (www.beeple-crap.com; check him out). I found him by doing a Google reverse-image search of this image:

http://www.beeple-crap.com
This is what started me on my journey down the trail of Beeple. This image inspired me to explore what was possible in the world of technical hard surface 3D modelling and rendering. There were quite a few things I was impressed with; primarily, the level of detail in this image was astounding. It felt very… believable. Beeple used common current-era materials to craft something completely new. Shipping containers, a bicycle, some cans, a cardboard box or two, and an air conditioning unit… these things are recognizable to the everyday layman. So when you see them stacked up into a huge post-apocalyptic Amazon truck, well, it feels more real than if the vehicle had been made up of elements that we could not recognize. Beeple has a lot of these types of images: images that are so familiar looking and matter-of-fact looking that they might as well be real. These are my 9 absolute favorites out of his 4,338 daily renders:

Image courtesy: Mike Winkelmann
http://www.beeple-crap.com
Image courtesy: Mike Winkelmann
http://www.beeple-crap.com
Image courtesy: Mike Winkelmann
http://www.beeple-crap.com
Image courtesy: Mike Winkelmann
http://www.beeple-crap.com
Image courtesy: Mike Winkelmann
http://www.beeple-crap.com
Image courtesy: Mike Winkelmann
http://www.beeple-crap.com
Image courtesy: Mike Winkelmann
http://www.beeple-crap.com
Image courtesy: Mike Winkelmann
http://www.beeple-crap.com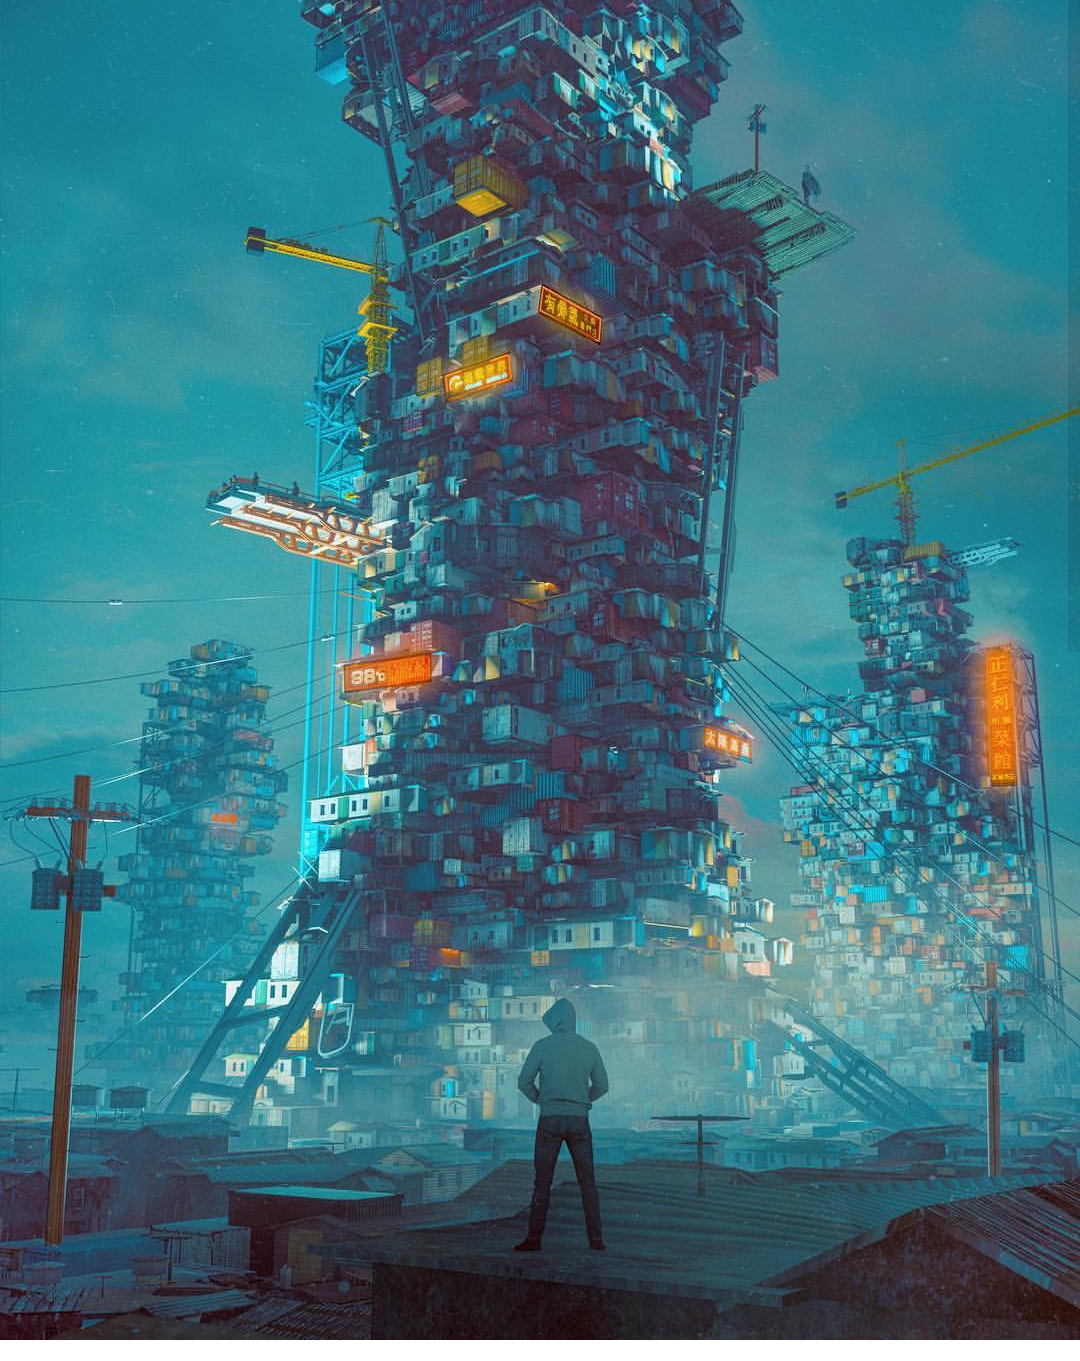
Image courtesy: Mike Winkelmann
http://www.beeple-crap.com
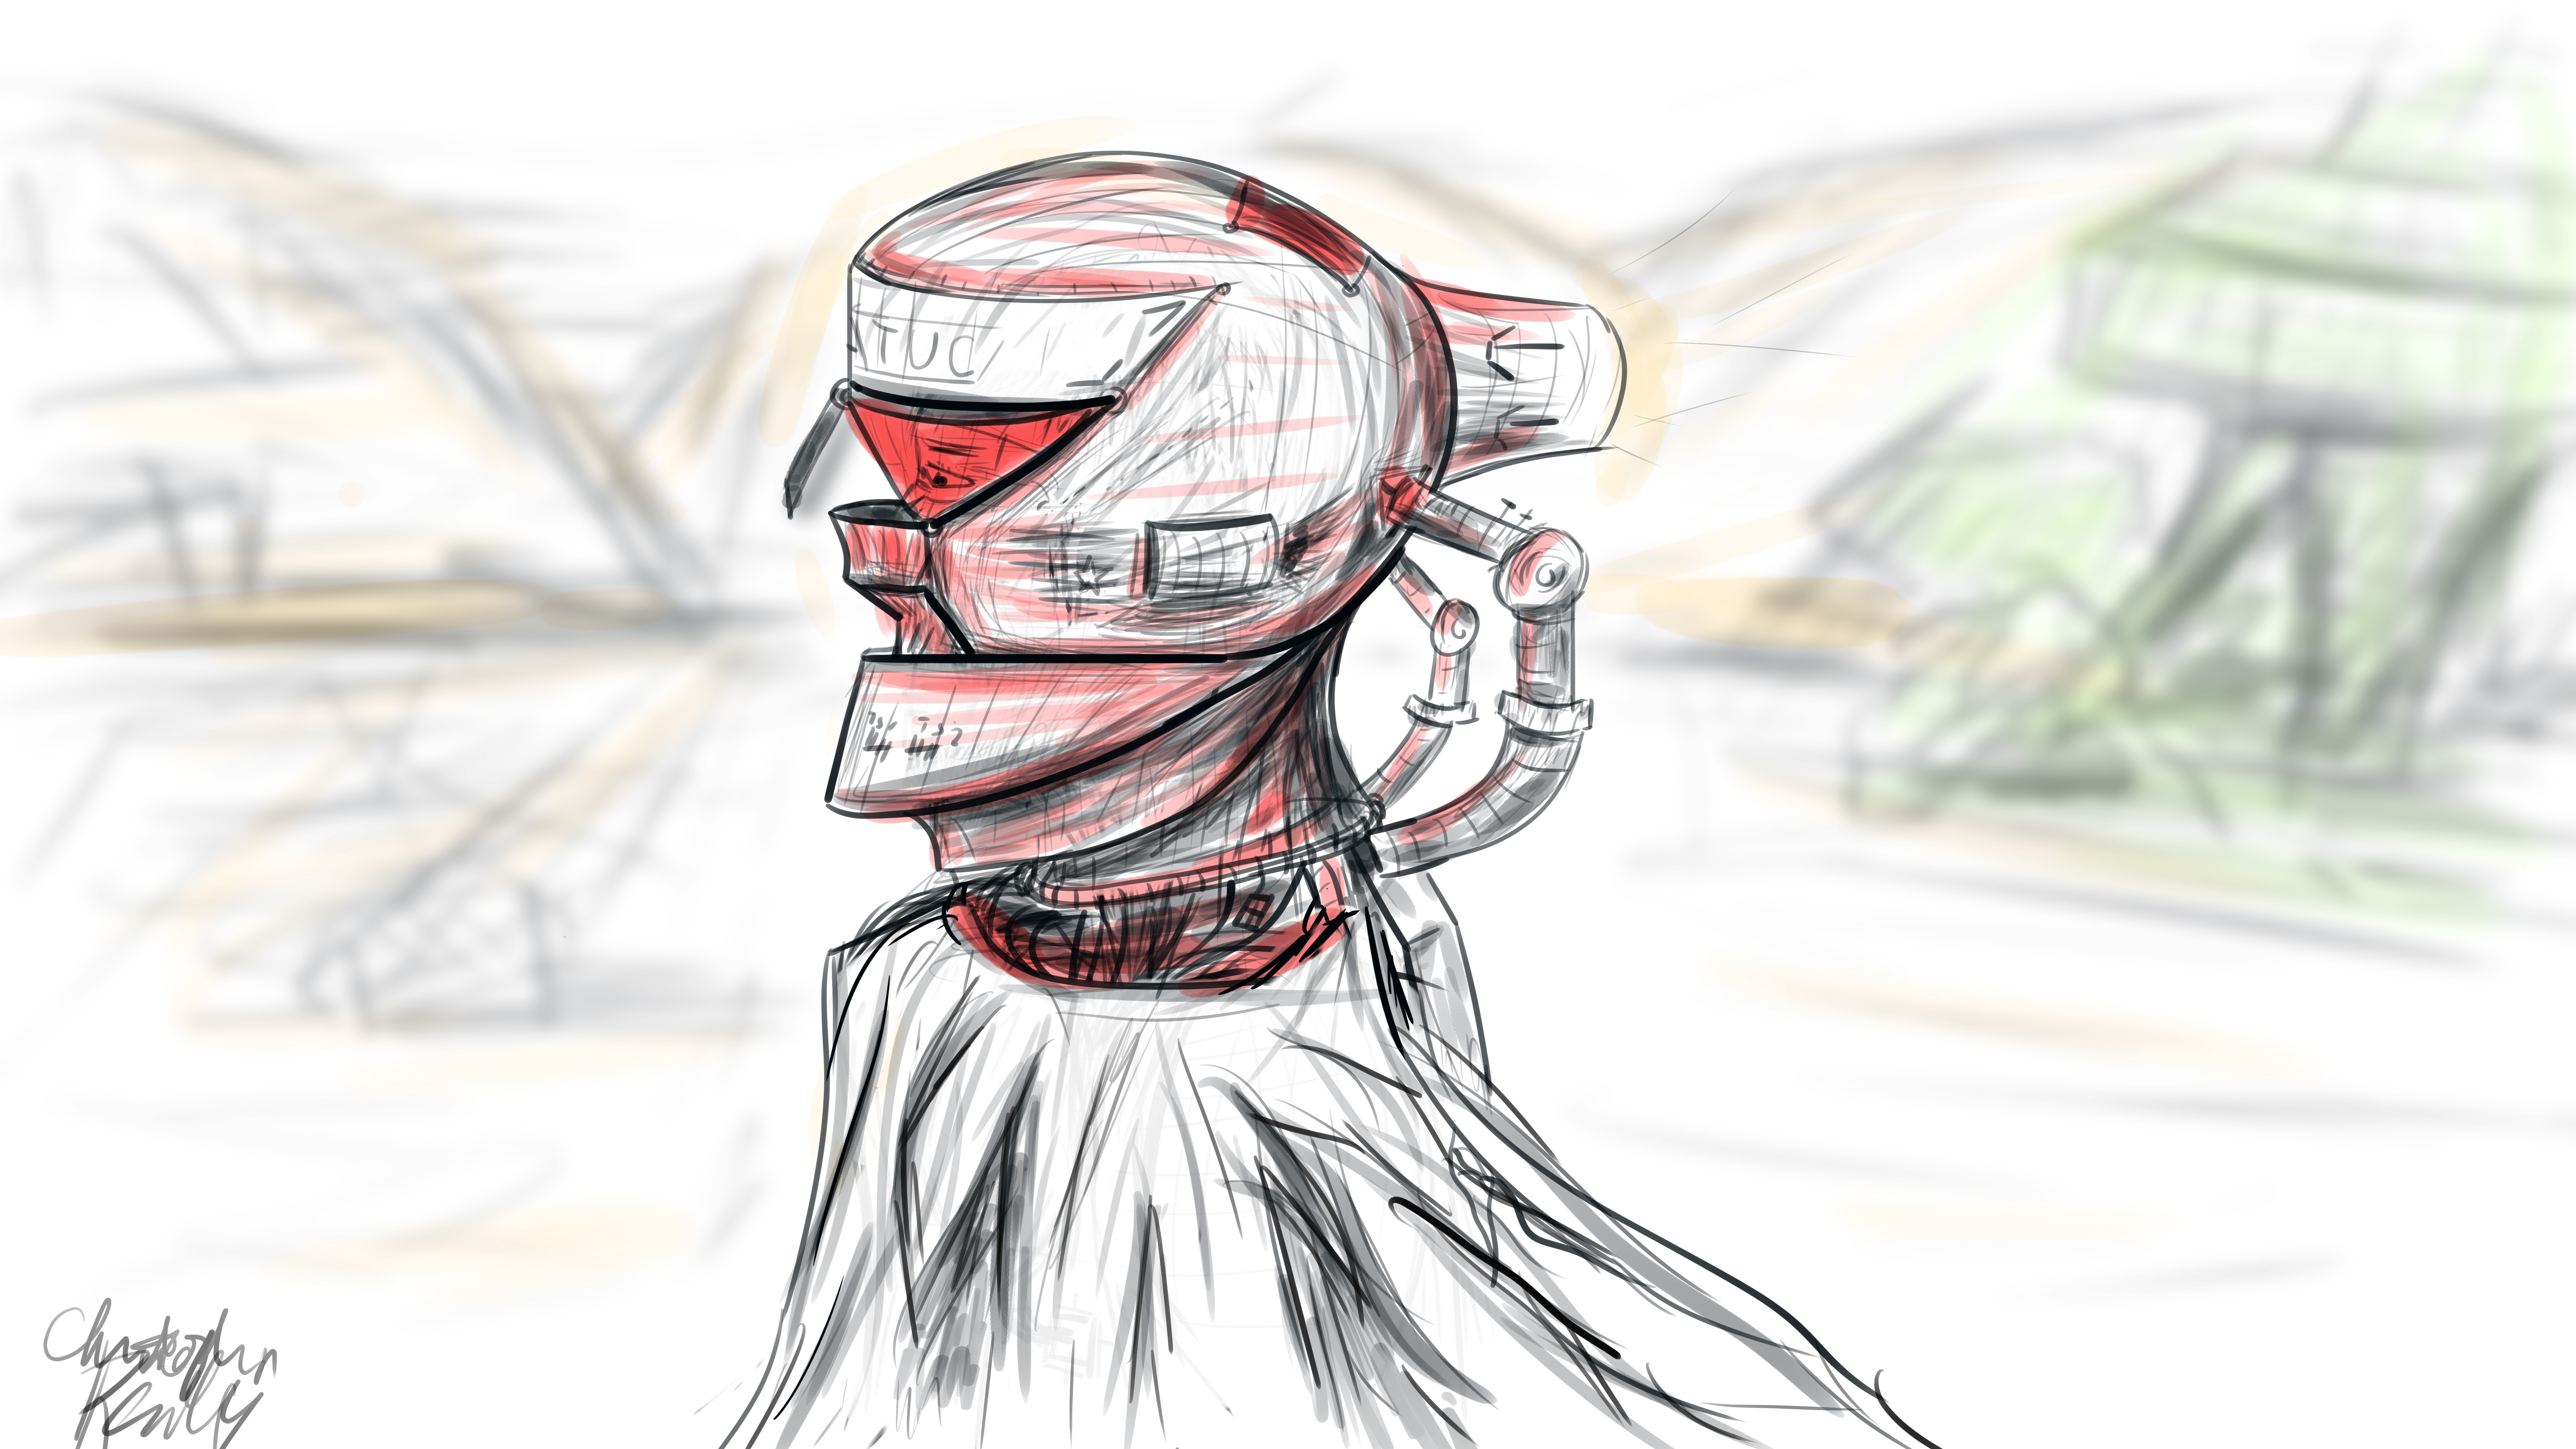
This is the kind of stuff that makes me stay up at night writing blog posts and frantically modelling increasingly complex technical nonsense. The technical detail… the accuracy… the style. It all made me want to be a technical designer or engineer all of the sudden. I realized I could learn a lot from this guy. And so, I began my first adventure into more complex hard surface 3D modelling. In Blender, I began box modelling with a subdivision surface modifier on. What does this do? Well, it allowed me to get clean, smooth surfaces and edges in my technical renders. Instead of harsh, sharp edges, I could make my objects as smooth as I wanted with much less effort. Take a look:
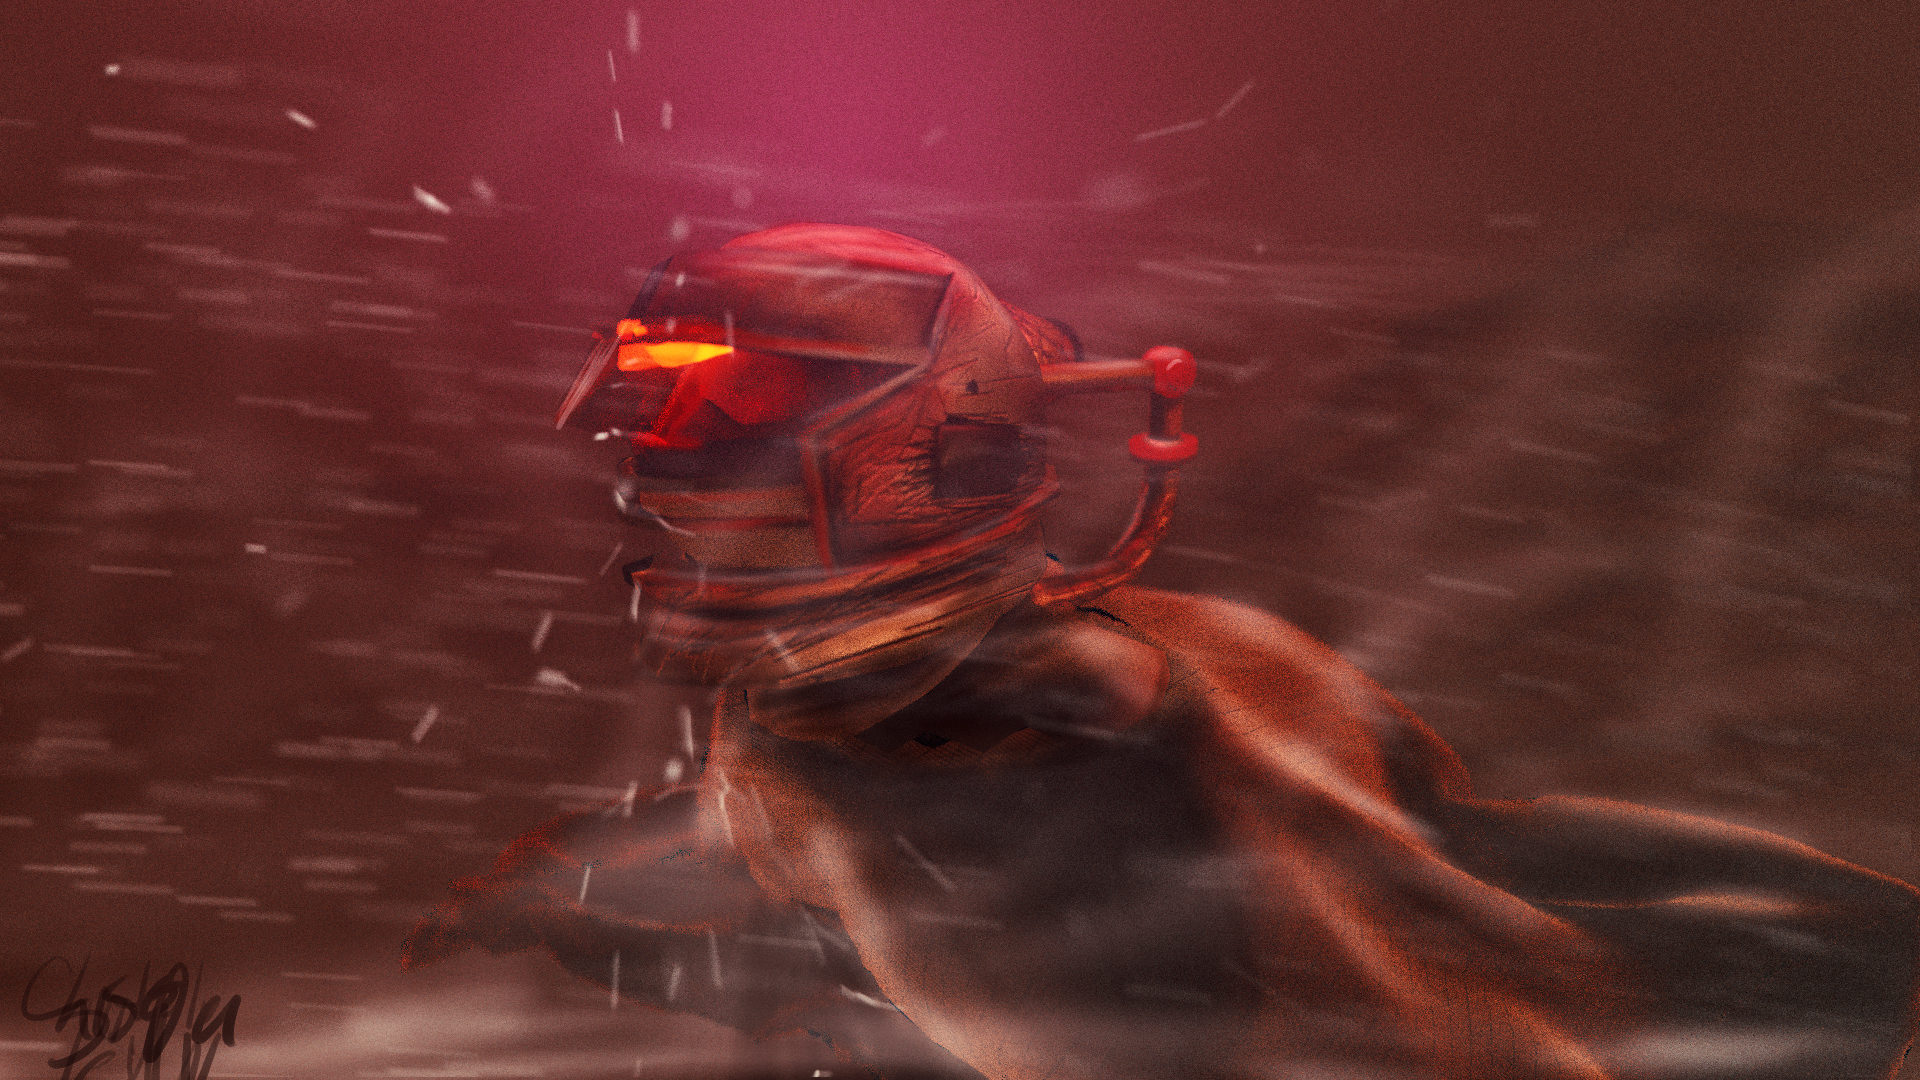
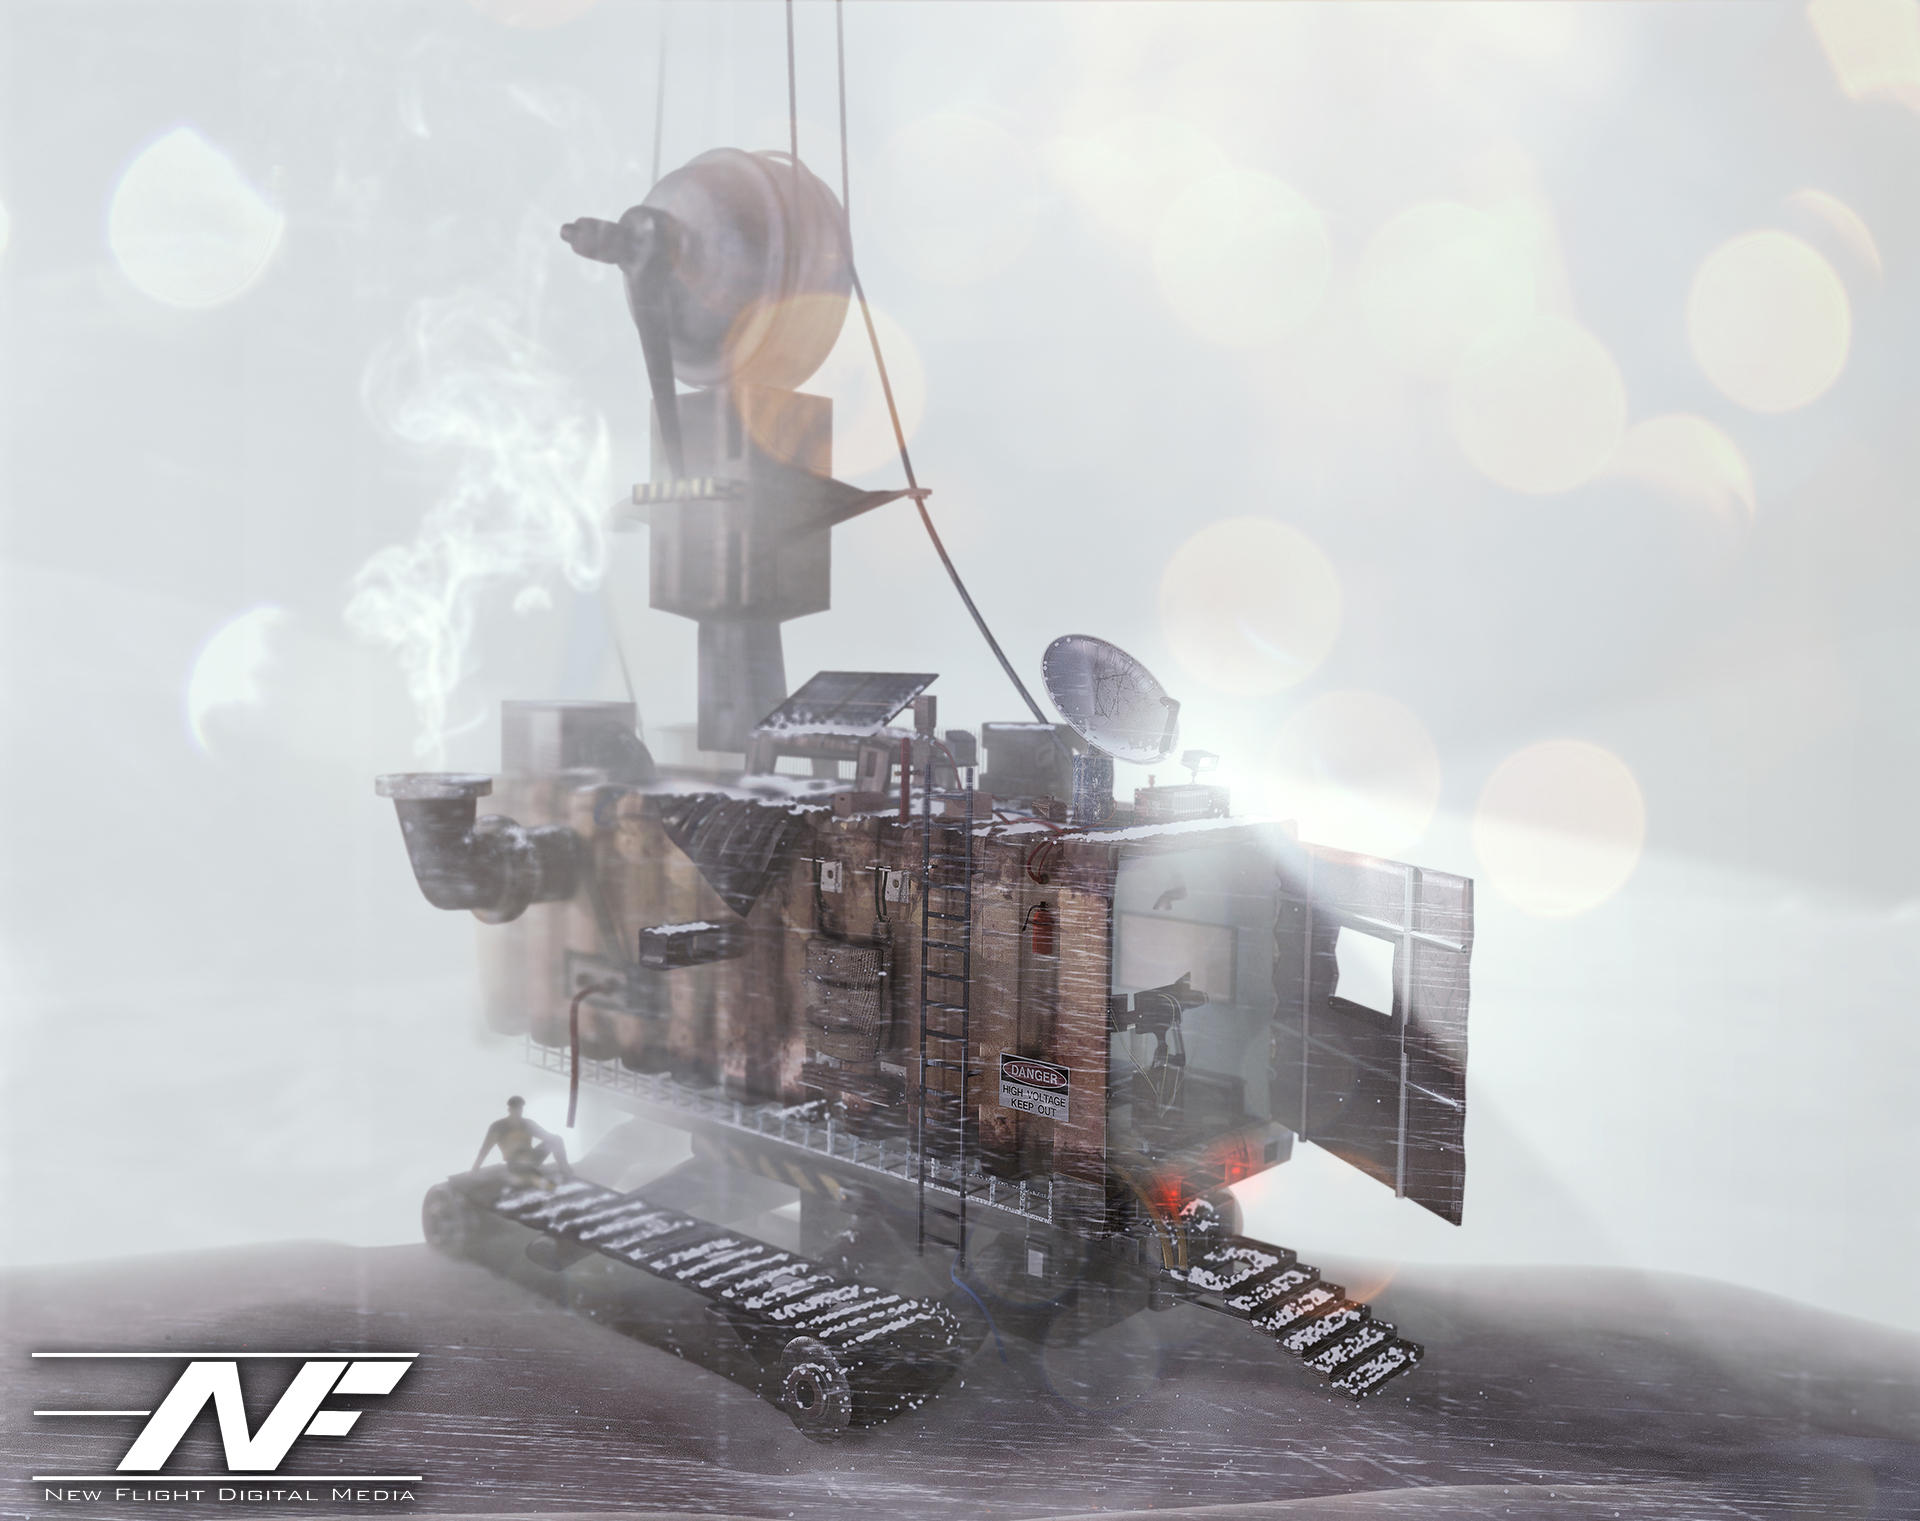
This is important because if you’ve noticed, nothing in the world is absolutely 100% sharp-edged. There is always a slight bevel or softness to an edge. The subdivision surface modifier divided and smoothed out my boxy geometry as I modeled. To get sharper edges, I would add a lateral edge loop and bring that edge closer to the exterior edge. As I did so, the exterior edge would become sharper and sharper. The result? Well, I was able to model some pretty interesting hard surfaces. Inspired by the first image I showed you, I decided to model a “tank” of sorts built out of a shipping container that might be driven in the future, perhaps. I decided to have it stranded out at a docking station, and I mentally built a story around that. I thought about where every item would go, and why it would be there. I used some particle simulations to add some snow to the shot, and took a TON of time lighting and texturing. The result? Have a look:

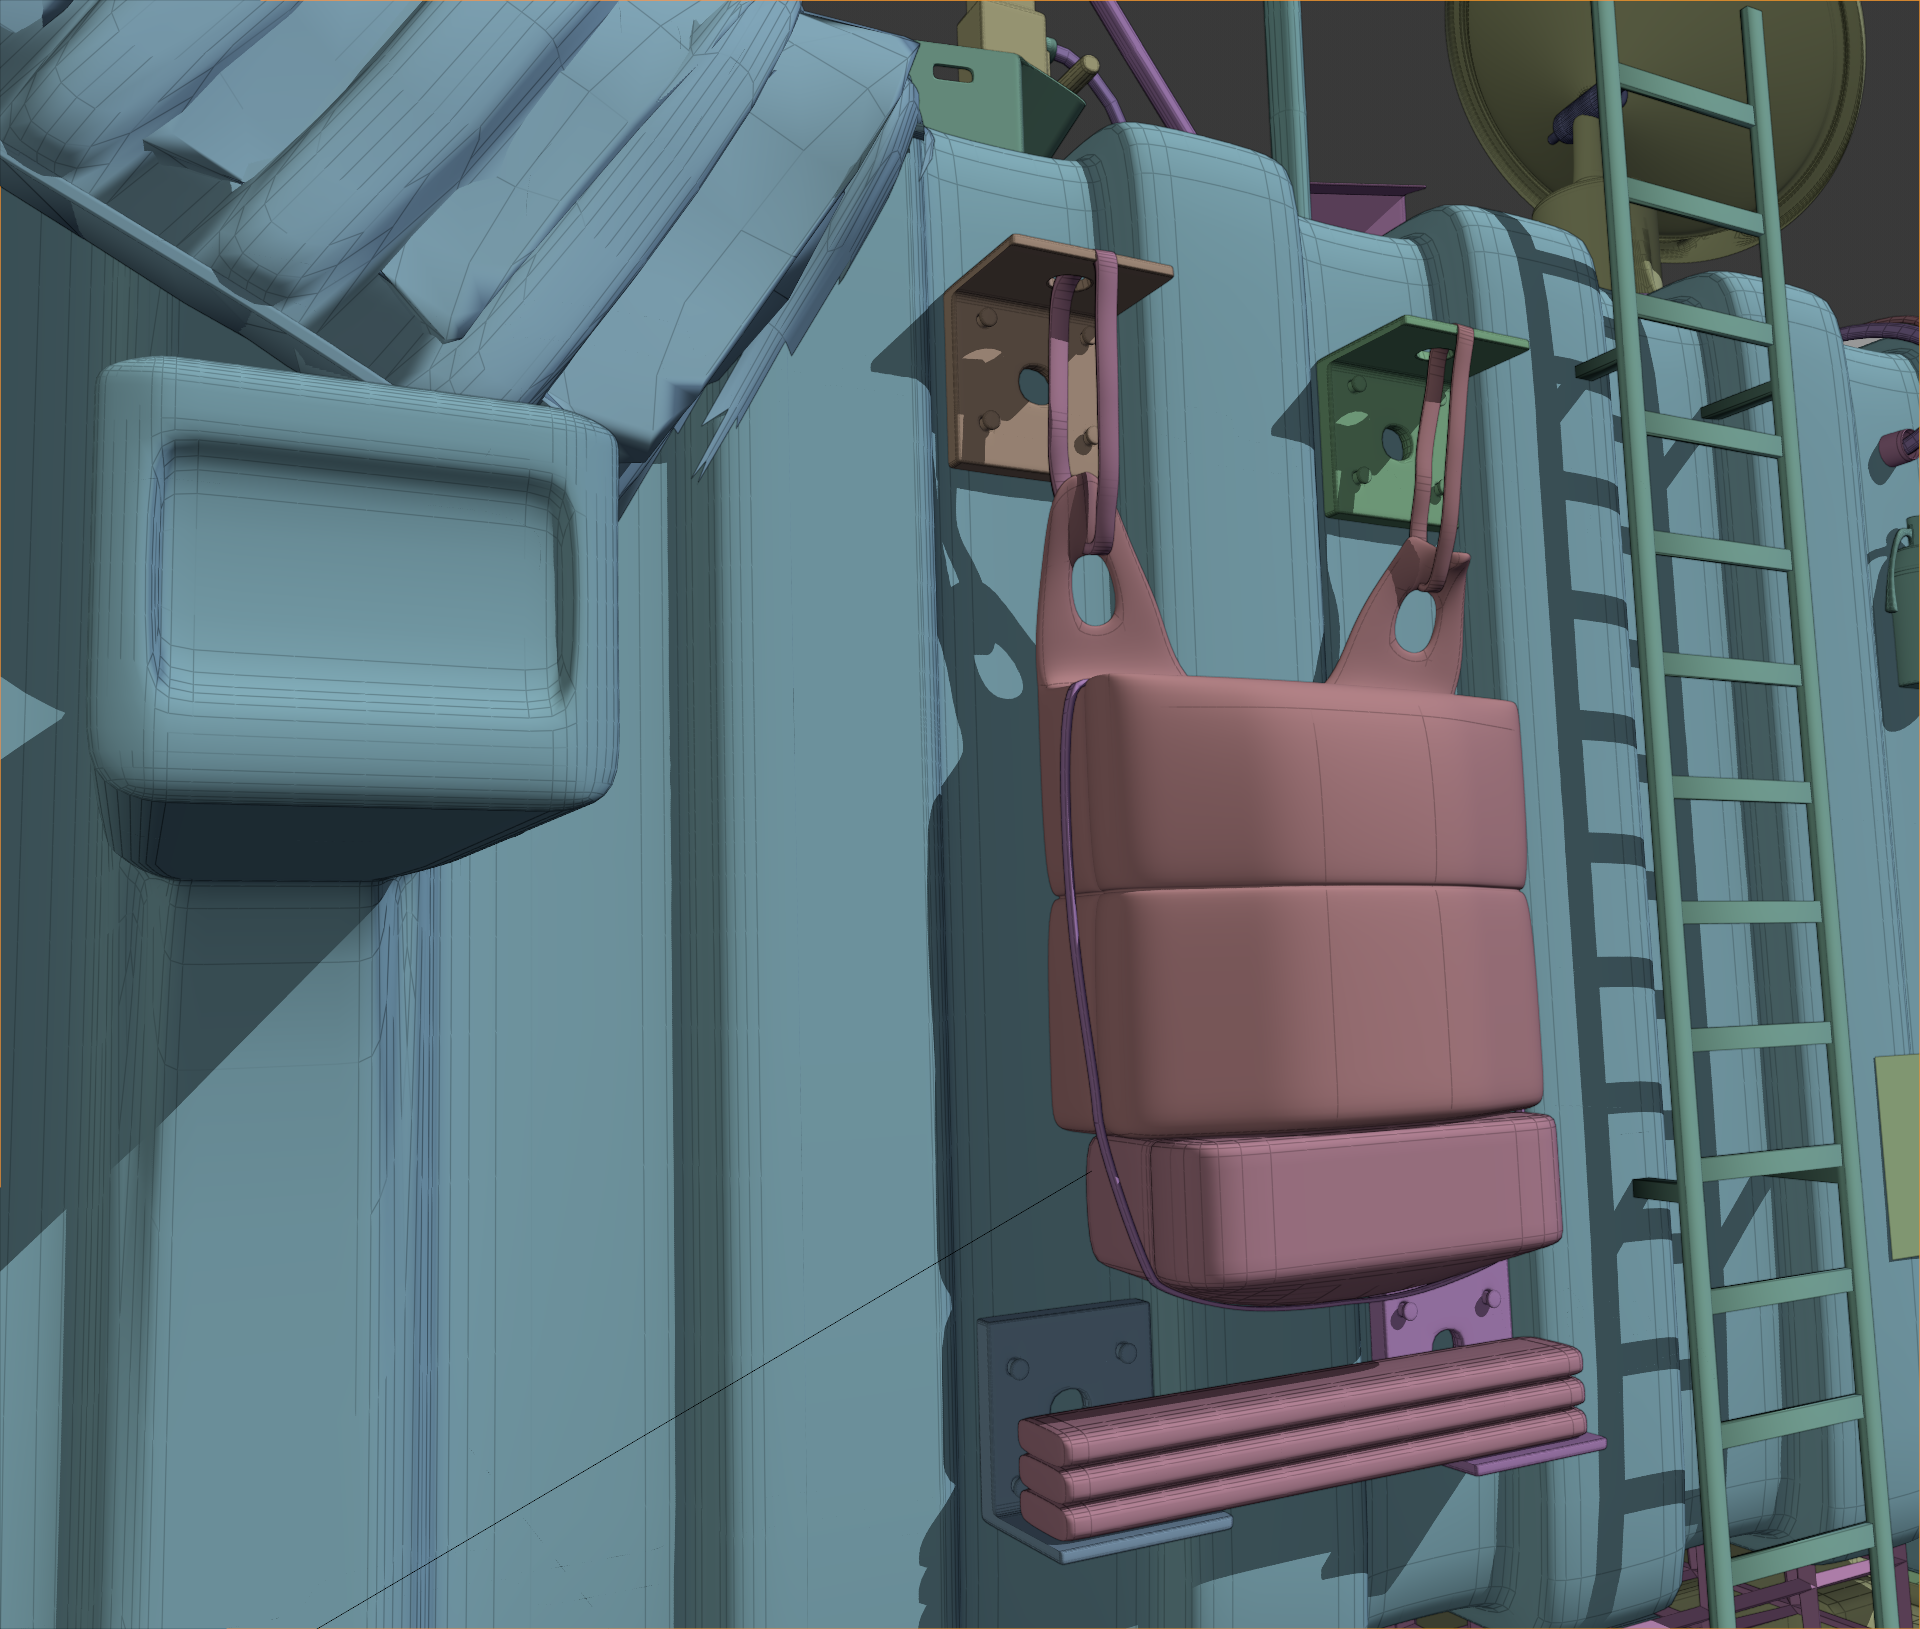
I liked where this was going. I went WAY overkill with this. I took about 3 weeks of on and off free time work to model all of the little details. Most of them aren’t even visible. For example, did you notice this flag bracket? Or these other details?
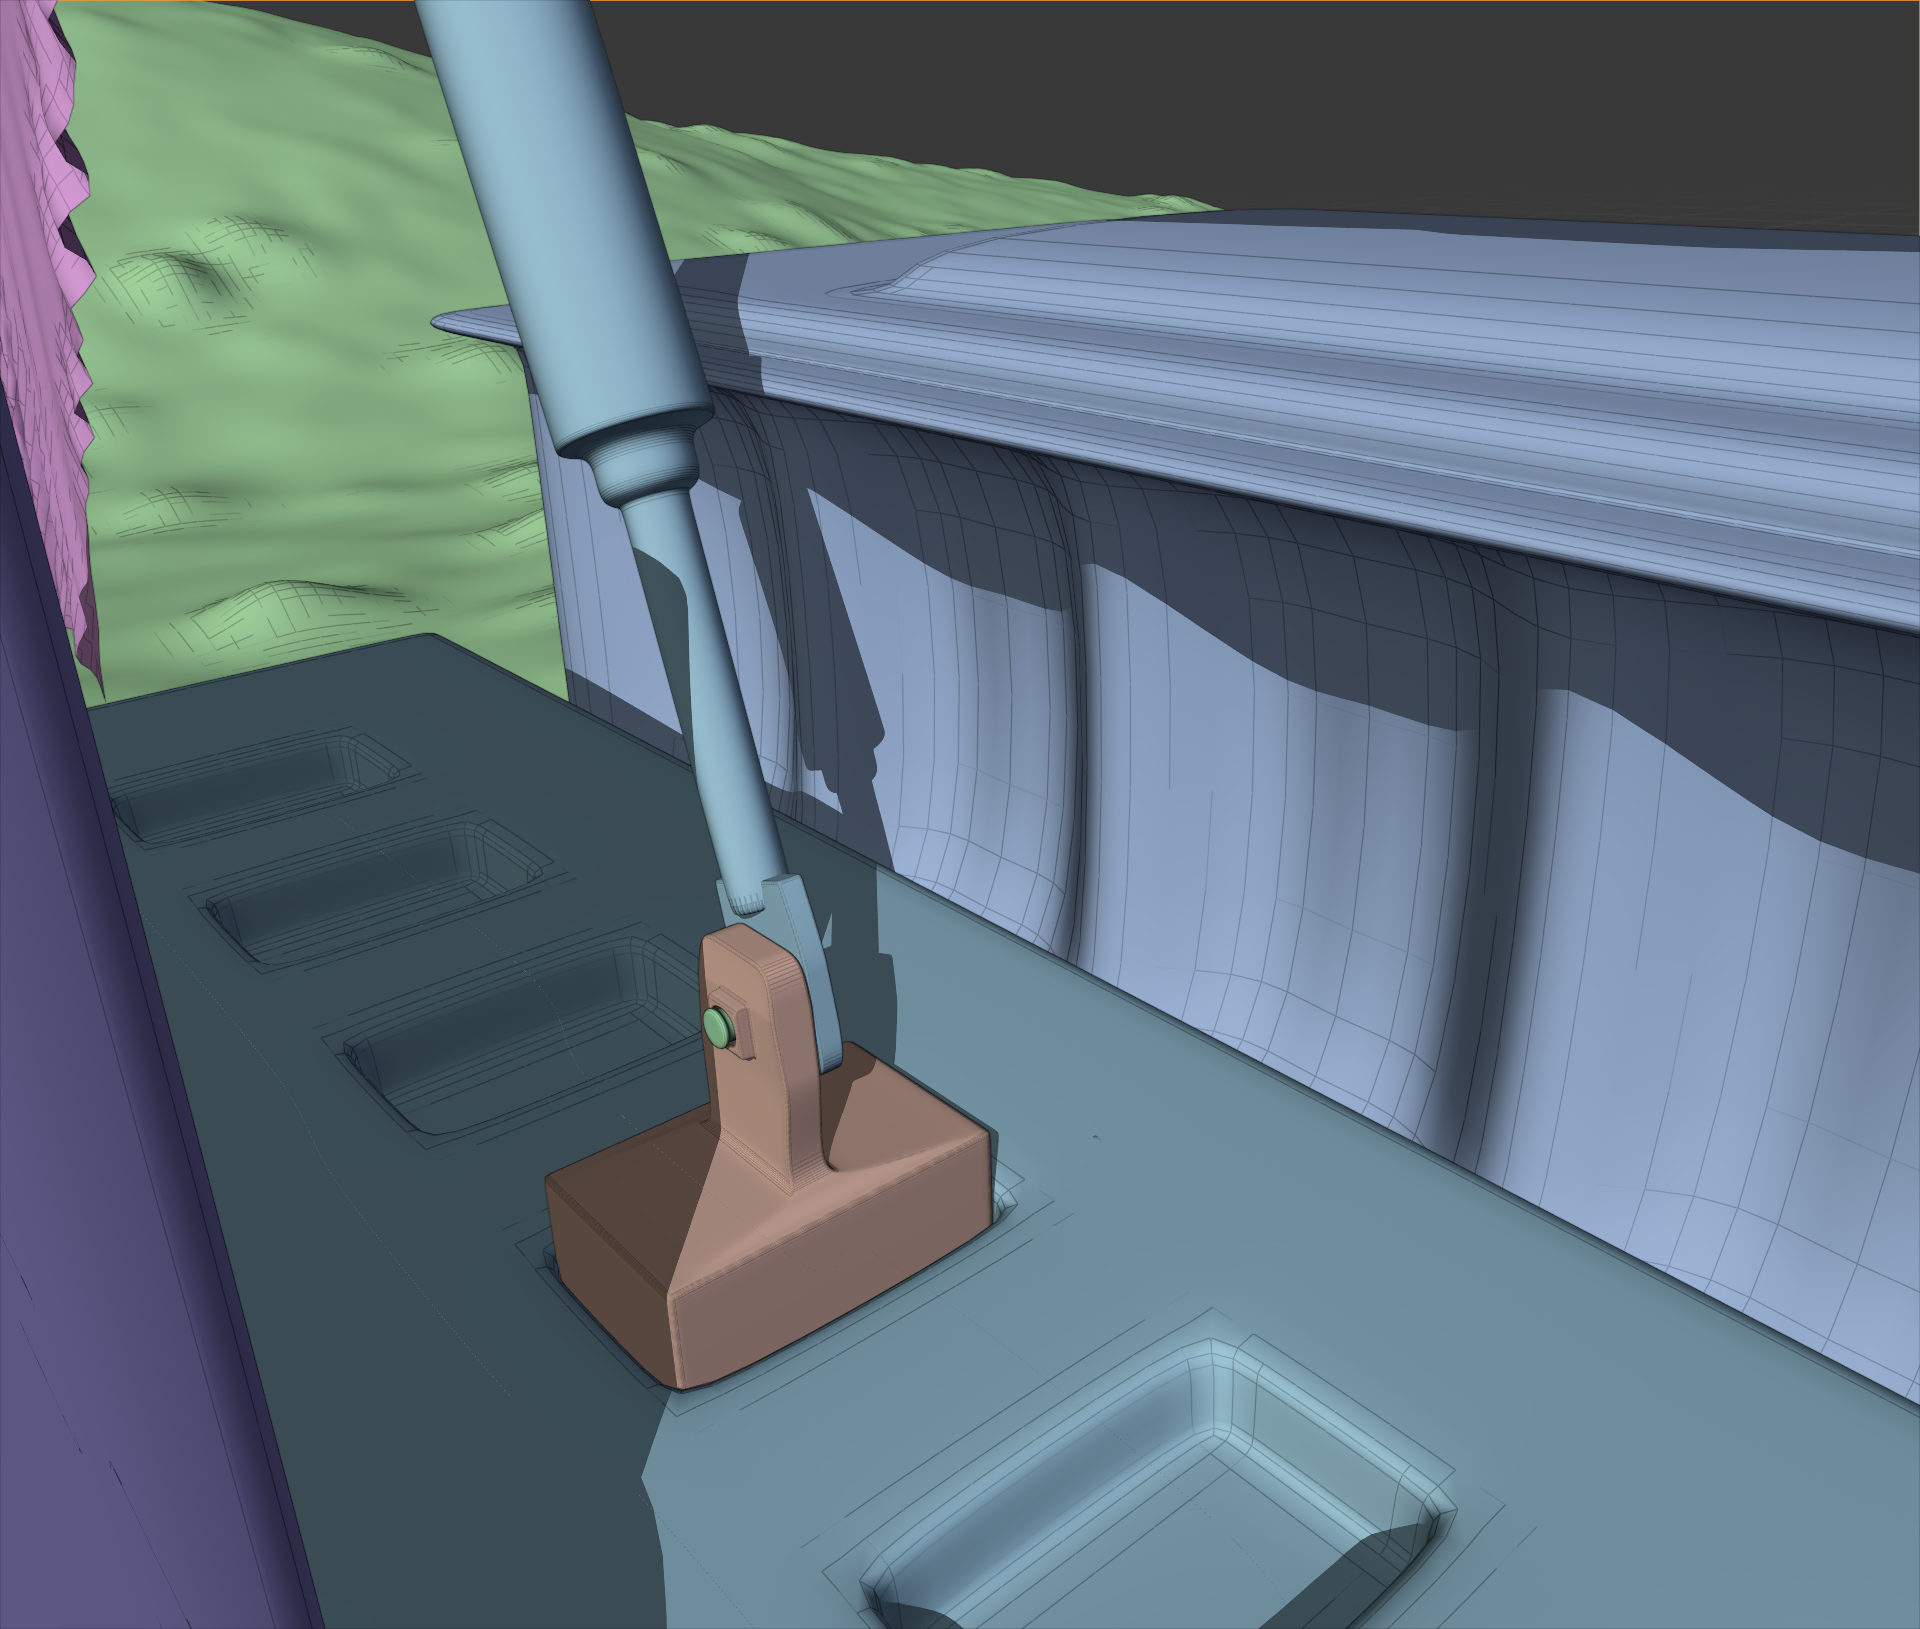
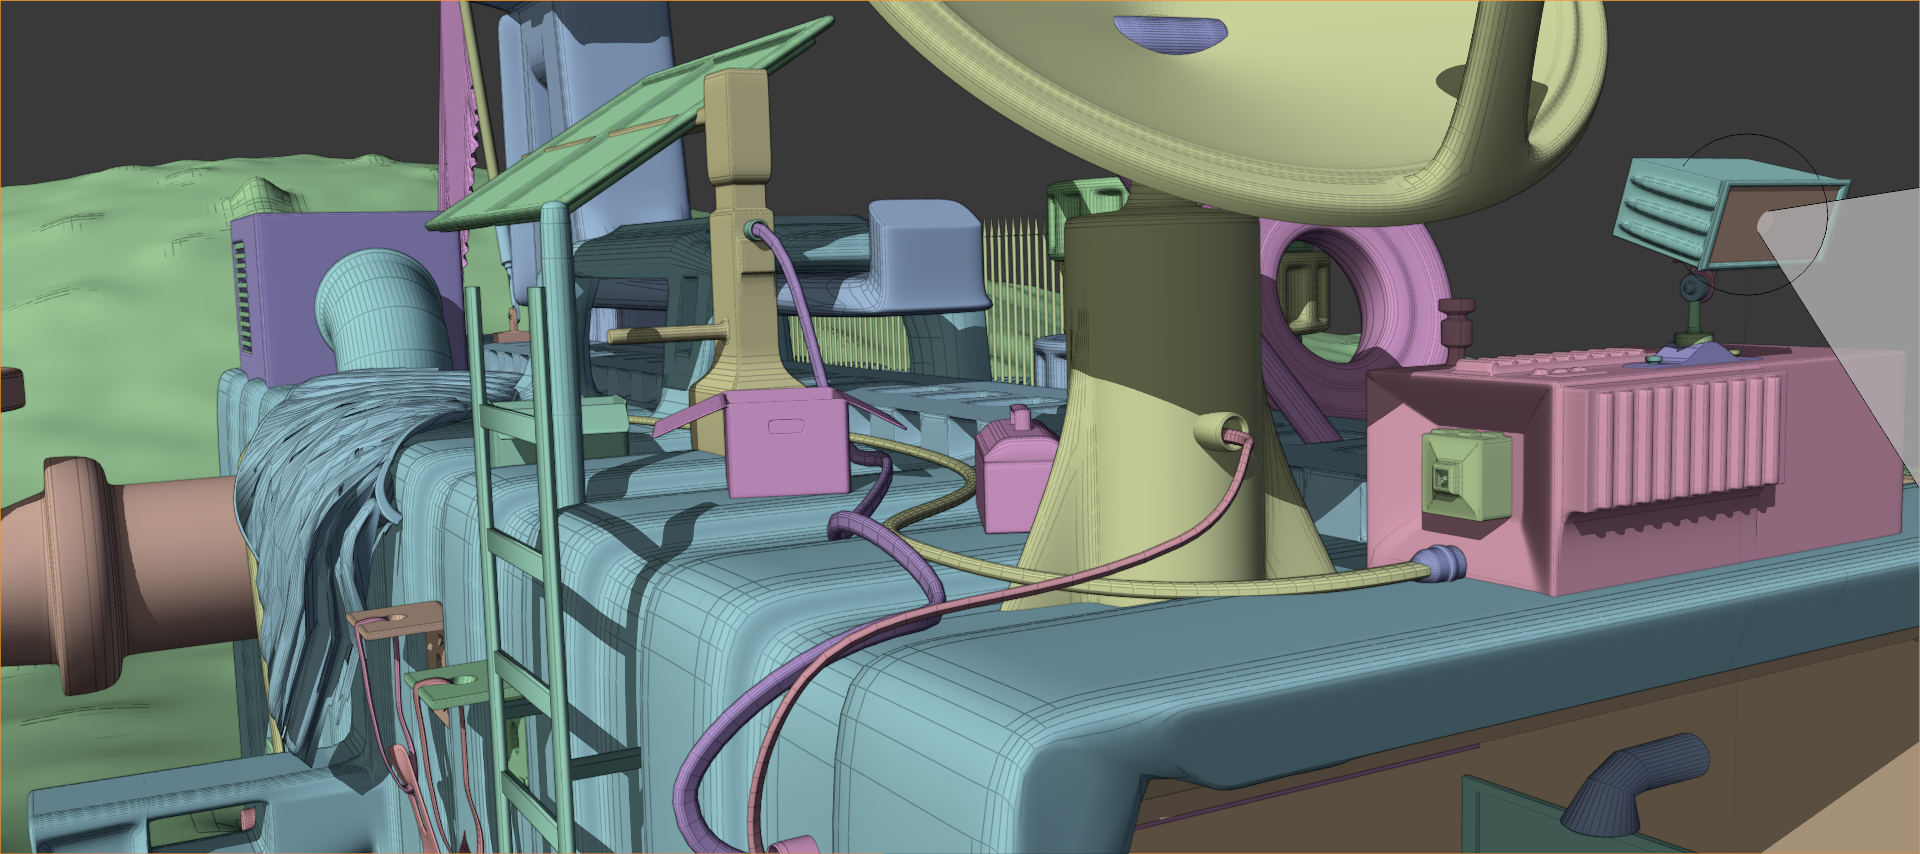
No? Well, the flag bracket was hidden from view, and those other details were hard to see. But I still modeled them. I modeled everything. There is even a fully furnished computer control area in the interior.
Next, I went on and did a project inspired by some of Beeple’s caterpillar images (see the gallery above). After around 2 weeks of work, I had these:
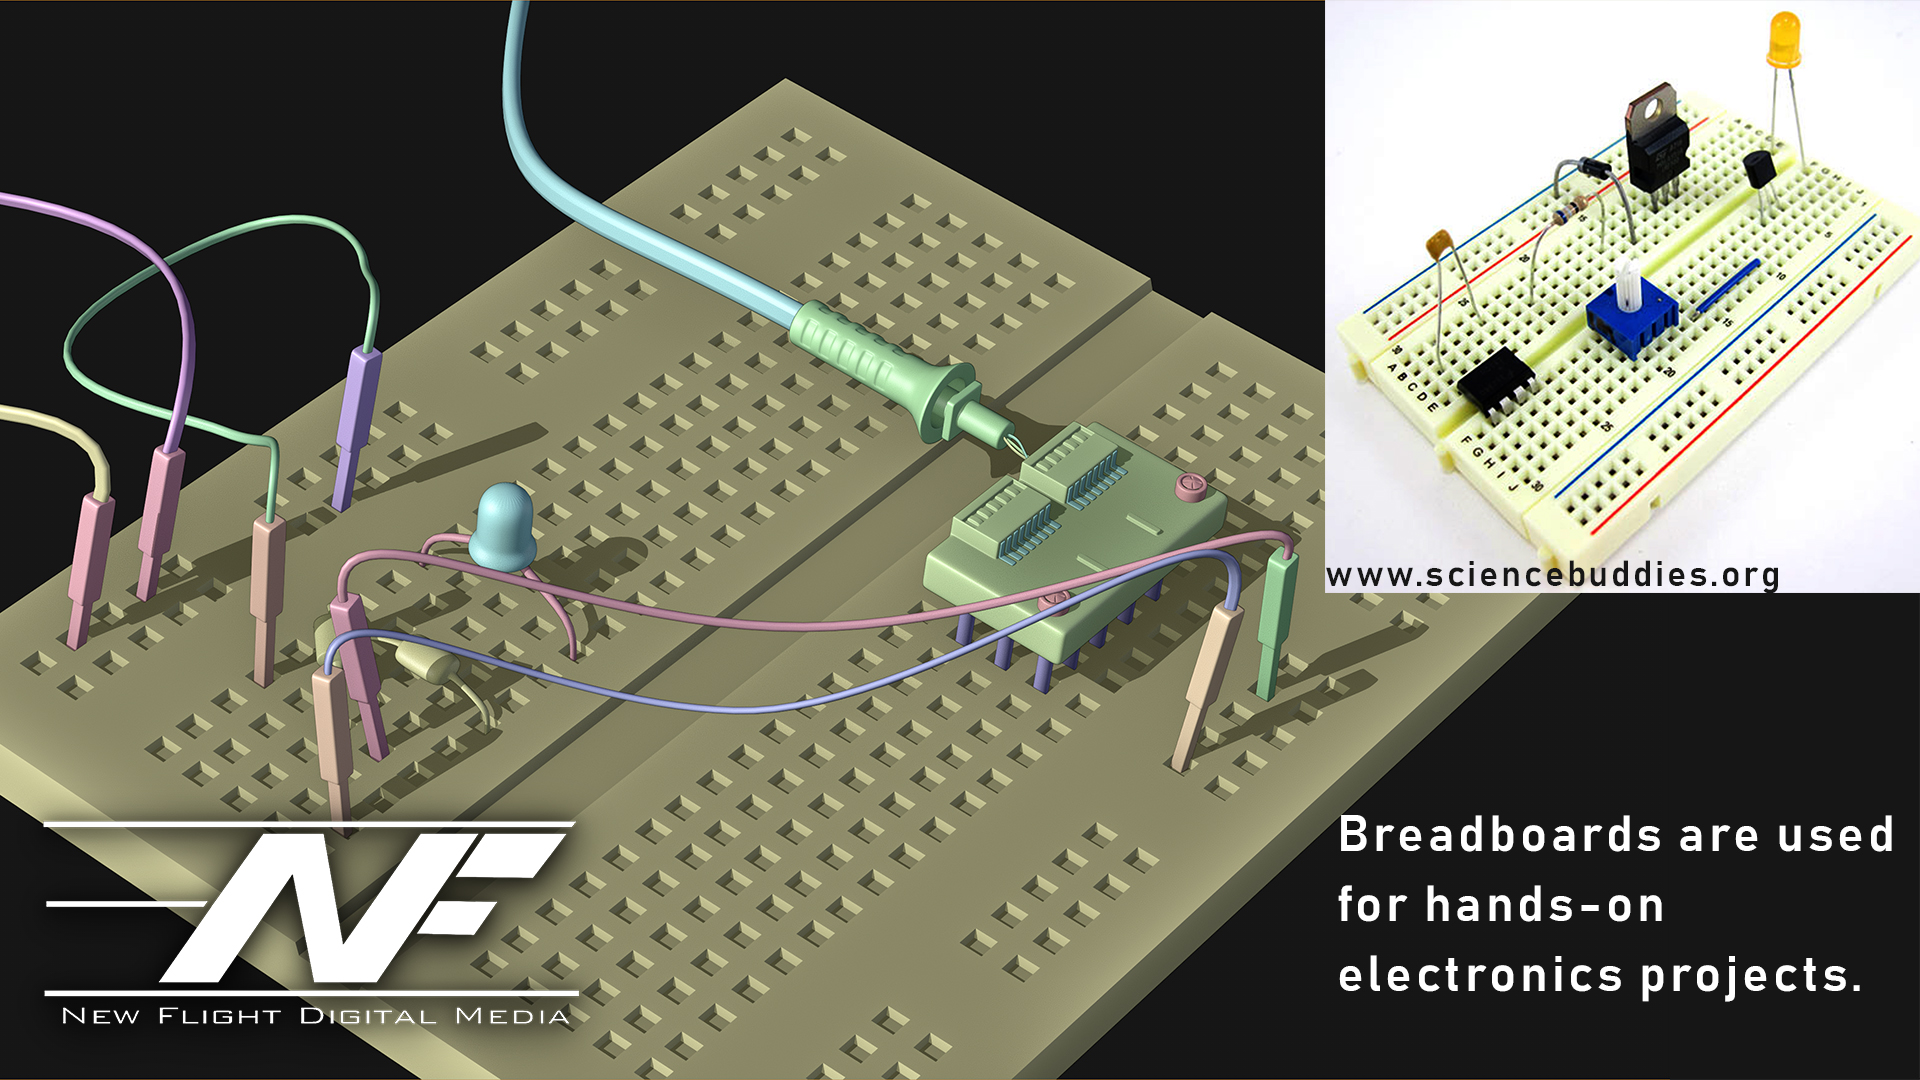
I added the human element using the open source “MakeHuman” program that I found out there on the great World Wide Web (it’s great, isn’t it?). Just like the previous image, a TON of post processing effects were done in Photoshop. Even the depth of field was done in PS using a depth pass! That’s right. See that black and white image in the Instagram gallery? I used that to define the blurriness of the image at any given point using the “Lens Blur” effect in Photoshop. Just add the depth pass as an image channel, select it in the effect dialog box, and voila! You have an automatic depth of field visualizer… in post production! I also used the depth pass as a mask for smoke effects, light flares, etc. Very useful trick.
The last hard surface modelling project I’ve taken on is something… different. It is not finished yet, but I decided to model a device of some sort. I kind of went crazy on the details here. It was inspired by my pocket multi-meter sitting on my desk as I write this (a multi-meter measures a bunch of electricity stuff). I thought… what if we had a device that could warp space and time? A modulator… but for the fabric of reality (I know I’m crazy). So I came up with an idea: the “Localized Axial Spacetime Modulator”. It would use these spatula-looking antennae to warp space and time. I did a ton of background research on what this would entail so that I could make this thing look plausible. Also, just like Beeple, I added a bunch of real world elements. Sockets and materials that science-oriented people would recognize add realism to the model.
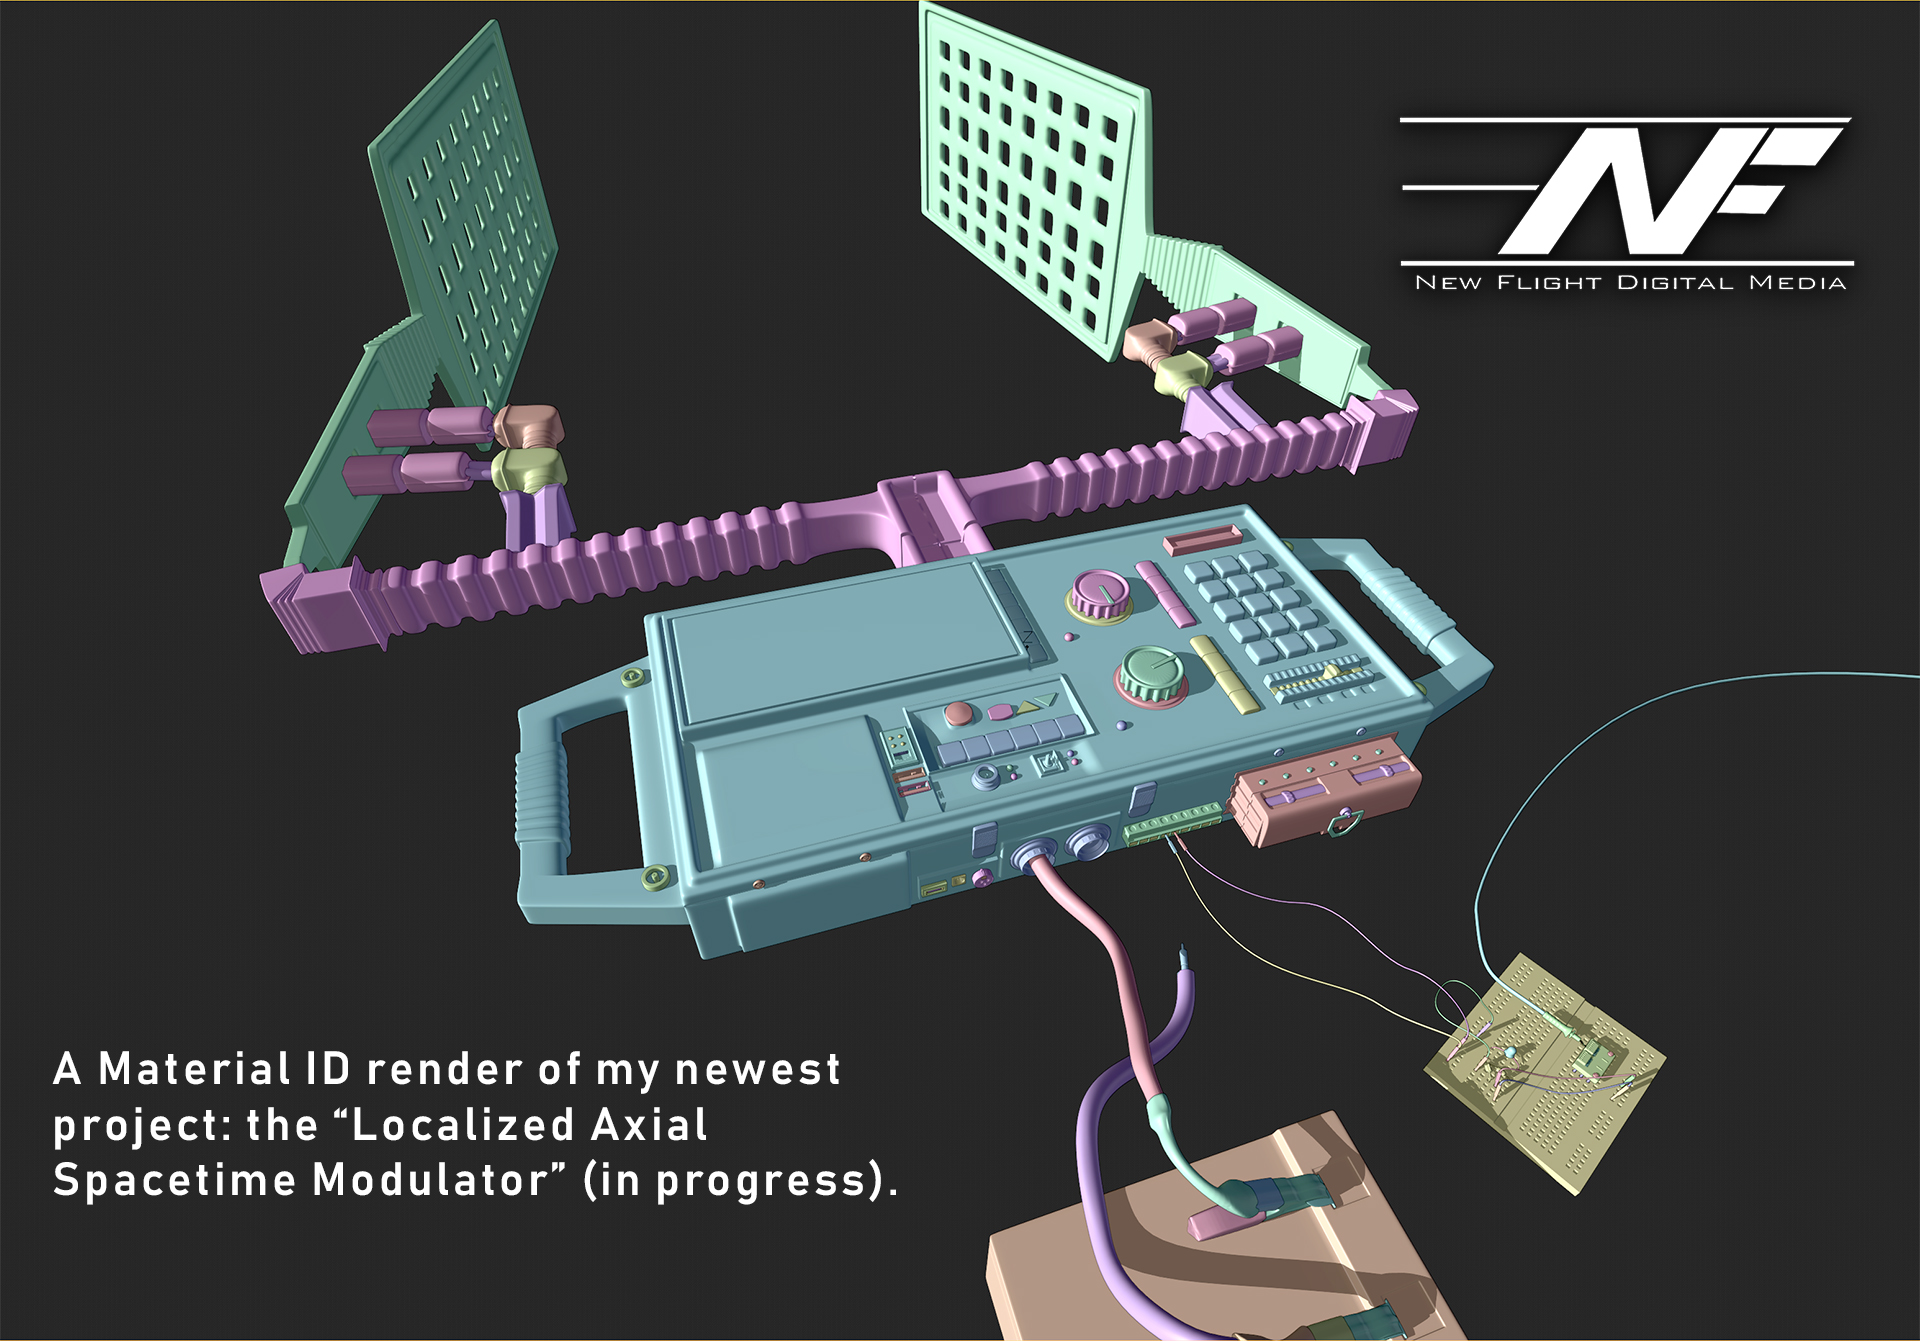
And now… the grand finale. This is my texturing I have so far: the screen of the device and the lower labels. Every part, every word and every pixel of this image has a purpose, a meaning and a reason for being there. I’m learning more and more that THAT is how you create convincing worlds: you have a why, a where, a when, a who… and fifty reasons WHY those things are the way they are.

So… that’s all for now! If you’ve made it this far, congratulations! And Beeple, if you read this, you rock man! Go check out Beeple at www.beeple-crap.com, and head over to my site at www.newflightdigital.com to hop on my mailing list. I only send stuff out once a month on average, so you won’t get spammed. Or, shoot me an email at contact@newflightdigital.com.