Enhancing Autumn Cinematography with the Power of After Effects 3D

This season I had the opportunity to do something I haven’t done in a while: seasonal nature cinematography! Depending on who you ask, nature cinematography can be inspiring, frustrating, calming, or anything in between. For me, it was an opportunity to combine some traditional filmmaking techniques with some After Effects magic. Using After Effects expressions, effects, and 3D camera tracking, you can turn your cinematography shots into entirely new, ethereal autumnal scenes! If you haven’t seen the video yet, check it out:

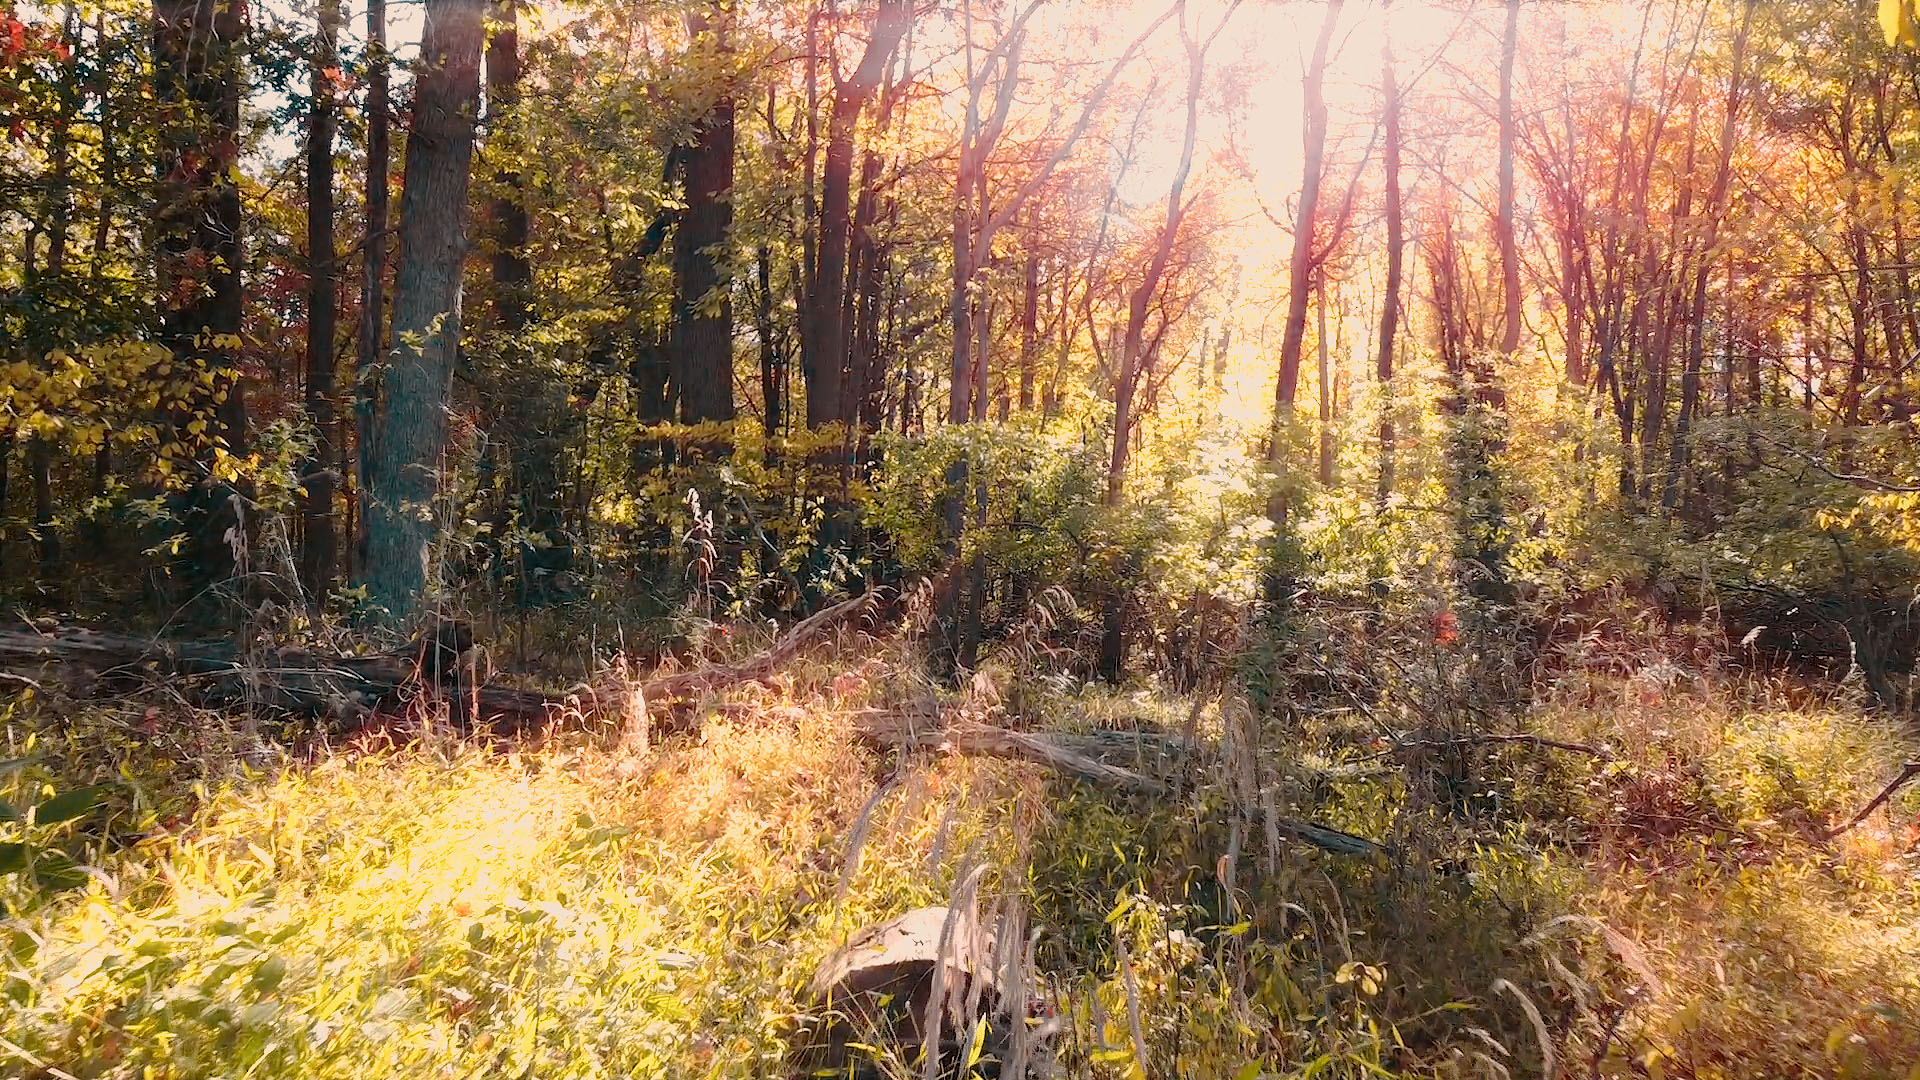
The first trick I thought of was using After Effects 3D camera tracking to add “god rays” to forest imagery. This volumetric trick allows you to render streaks of light appearing from in between branches, leaves, etc. to give your shots some atmospheric realism. We can get the origin of the rays to remain the same thanks to After Effects’s 3D features!

First, prep your footage. Get it into the lowest frame rate you’re comfortable with (shouldn’t be under 24FPS). Next, track your footage with AE’s camera solver. This is automatic, so it shouldn’t involve much more than just pressing the button, sitting back and waiting!

After the track is done, select the camera track effect in the effects panel, hover over the footage, and you’ll see some 3D markers. Right click on the spot in the image where the god rays would be coming from, and click “Add Null and Camera”. This will plop a null object right in 3D space where the light is coming from; scrub through the timeline and you’ll see it stays in the same spot. Perfect!

Now, how to get those rays? First, duplicate the footage layer, and apply a radial blur effect. Set it to a zoom mode and adjust the amount until you see a streaky semblance of your image. Then, alt+click on the center point icon (little target). This will allow you to write an expression to tell AE where to put the center point. We’re going to tell AE to use the 2D screenspace that corresponds to the 3D null object’s location. To do this, paste this code as the expression (but change the values for your footage):

src = thisComp.layer('Null'); // Enter the name of the Null you made
src.toComp([0,0,0]);

Next, we only want the streaks to show up when the part of the screen where the light is coming from is bright. Otherwise, the light is probably blocked by a branch, etc. We can tell AE to adjust the opacity of the streaky layer according to the brightness of a certain part of the screen! Alt+click on the “opacity” timer icon, and paste this code in as the expression:

area = comp("NameOfShot").layer("NameOfLayer");  //Enter name of your comp shot, and name of the layer.
sample = [960,260]; //This is the location in the image you want to sample.
sampleArea = [50,50]; //This is how much area around that target you want to sample.
luminance = rgbToHsl(target.sampleImage(sample,sampleArea))[2];
linear(lum, 0, 1, 50, 100)

That code will adjust the opacity according to the brightness of an area of the screen of your choosing. Finally, just change the blending mode of the streaky layer to “Add” or “Screen” so you only get the bright parts of the image, and (after a bunch of tweaking of values), you’re done! You’ll also want to add a “curves” effect to the streaky layer to control the sharpness of the rays.

Before & After (Slide)

I hope you enjoyed this little After Effects tip; we’re open for custom work, animation, visual effects and more! Visit www.newflightdigital.com for more info.

3D Printing Workflow for Practical Film Effects

With the advent of 3D printing, practical effects have begun to make quite the comeback. What used to be industry standard has gone from obsolete to a specialized type of work, often sought by directors that want to give their films an “authentic” look. From costumes to sets, 3D printed elements allow for new authenticity in special effects. In a January issue of “3D Artist”, Nathan Crowley, production designer for the movie “First Man”, explained the use of 3D printers in creating spacecraft for the big screen. “We had 18 3D printers in the art department which literally ran 24 hours a day for six months…”, he says. I figured the time had come to give our readers a quick tour of the New Flight Digital 3D printing workflow.

The Ender 3

At the heart of our workflow is the Ender 3, a cost effective 3D printing workhorse with a variety of benefits in the practical effects production area. I use this printer to create small sets that are typically used in custom animation scenarios in which a practical miniature set is needed. I print at a layer height of 0.08 mm. Controlling my printer is a Raspberry Pi running OctoPrint, a free program designed to make printing over a network easy. This allows for easy access to the printer in different physical areas. Temperature and other aspects can be monitored and controlled through the web interface.

Along with the Ender 3, I have set up a powerful LED lamp connected to a network-controlled relay module. This way, I can turn the light on and off via the relay module’s web app. Also running on the RPI is a webcam stream of the printer for easy visual monitoring remotely.

I have been using this printer often as a “clone” tool for some 3D objects; that is, using photogrammetry, I have been able to print small copies of real-life 3D objects. The process is quite simple, but allows for sets and models of real-world locations to be built for tabletop practical effects.

Russian visual effects company “Scandinava” has been very successful in their usage of physical models and visual effects. Combining the two, the group is able to produce incredible looking visuals that would take insane levels of computing power to recreate digitally otherwise. Check out their Instagram at www.instagram.com/scandinava .

All in all, I am excited for the new year ahead, and all of the great opportunities I will have to continue producing practical effects using 3D printing and other emerging technologies.

Creating a Futuristic Concept Scene: Speed Designing with Photoshop and Blender

Last night, I created a set of simple concept images in roughly 4 hours of on-and-off work. My goal was to quickly develop a partial continuity between two images, establishing a sort of implied workflow utilization. In other words, I wanted to first create a hand drawn digital image of the concept using a pressure sensitive pen tablet. Then, using this drawing as a guide, I wanted to speed model and texture a 3D environment inspired by the drawing, thereby establishing a workflow continuity commonly seen in the industry: from hand drawn concept image to rendered concept image.

I began in Photoshop, where I set up a 16*9 inch 500 ppi resolution document with no guidelines. I set the pen size to roughly 25 pixels for fine control of the design. I decided to go for a neofuturistic, bleak image of an astronaut of some sort traversing a somewhat barren area. I wanted to combine elements of the past into the image by featuring a draped cloth, which would be covering the lower half of the figure’s visible physique. I began to draw with smoothing at around 50%. I first did a complete sketch of the man’s face from the inner muscle groups outward, even though most of this would later be covered by other elements, such as his helmet. I even included facial hair. The man’s thin face and the shape of his jaw helped dictate where the different elements of the helmet would go, and what shape they would take.

The first defining strokes I made staked out the area that would later make up the visor part of the helmet. I defined the opening that the man would be looking out of, as well as the collar piece and other essential components of the structure. Once I had pieced the entire structure together, I began shading the image according to the geometric contours using various pen widths and shapes until I was satisfied. I blocked out elements of the man’s bare face using white shapes with various opacities to define the surface of the helmet.

To go from 2D to 3D, I first sculpted the man’s bare face using the sculpting tools in Blender. I then began forming the geometric segments of the helmet around the face according to their required positions. I frequently adjusted the design and shape of the pieces on the fly as I went. When I was ready, I used Blender’s texture paint features to literally draw on color and damage marks, and applied these image textures to the model pieces in the node compositor. I used glossy shaders for the most part, and reused the hand drawn textures as displacement maps to give depth to the material.

To achieve the cloth look, I created a subdivided plane with a hole in the middle around the figure. I “pinned” the vertices at the center so that they would not move, and then ran a cloth simulation using wind and turbulence forces to achieve a billowing cloak model. I textured this using a combination of an opaque velvet shader and a transparent shader in a mix shader, with the factor set to a stretched brick texture. This gave me long strands of “cloth”, which looked like a woven burlap material up close.

I then ran a particle system with wind and a collision object to simulate snow, and rendered this separately. I pulled everything into Photoshop, applied a lookup table, touched up highlights and shadows using the brush tool, and composited dust and smoke into the shot, and rendered it out. The resulting image is comparable to the original sketch, albeit vastly different in proportion.

This exercise has given me some insight as to how concepts tend to change from conception to execution, and how one might go about adapting reference images for use in 3D environments. To see more of my work, go to www.newflightdigital.com. Feel free to reach out to me at contact@newflightdigital.com.

Motion Capture for Music Videos: Update #1

Over the course of the past two days, I have had the pleasure of working with the Shadow Motion Capture System to create motion capture data for characters, which will be featured in a music video. The music video takes place in a swamp, for which we are creating some creepy practical effects using a diorama. As such, the “people” performing the music will be swamp animals, created with animation and mocap data. 

Practical Effects created with a Swamp Diorama
On set with the “Gods of Fire” during a mocap session

Without giving too much away, a frog will be singing the song, while other animals such as raccoons and lizards play the rest of the instruments. The mocap suit requires several sensors to be placed over the shoulder blades and on the chest, which often come loose during rock-out sessions. This was our biggest challenge, but we overcame that before long once we determined how to best fasten the sensors. The mocap suit transmits a 5Ghz wifi signal back to a laptop running the latest Shadow software, allowing us to record the data. To begin, we needed to have the actor strike a “T” pose, with his legs together and arms out like a T. This allowed the sensor to calibrate and determine the orientation in that pose. Once the software knew the orientation in that pose, it could determine the orientation in any other pose. 

We experienced small problems with the device, but nothing too significant. For example, the device comes with foot pads that go in the user’s shoes. These pads sense pressure, and therefore, determine whether the user is in the air or not (during jumps). Since our talent was rocking out, he would often perform mini jumps in enthusiastic dance. These jumps were not enough to “trip” the pressure sensors, so they did not know the user had left the ground for a moment. As a result, the mocap figure preview on our computers would slowly slip downward as the sensors de-calibrated. The solution, of course, was to cut the jumps and replace them with other enthusiastic movements. Below, you can see our entire broadcast from yesterday when we recorded the mocap data:

All in all, the mocap session was a success. I exported each session as a BioVision Hierarchy (.bvh) file, and imported them into my favorite 3D program, Blender. To make the 3D models of the animals move, I used a plugin called MakeWalk, from http://www.makehumancommunity.com. The plugin takes BVH data and retargets it to a separate rig. To start, I produced a BVH rig for the animals using MakeHuman. The rig is one that MakeWalk can understand (since they are sister applications). I then edited the rig to fit the curvature of each animal, and then applied it to the model using automatic weights. This means that each “bone” in the rig affected a part of the model in a way that the application determined automatically. I then edited the automatic weights to better reflect the animal’s anatomy (for example, the upper arm bone should move the whole upper arm, etc.) After this, I retargeted the rig to a .bvh file recorded on set, and voila! The rig and model moved and acted just as our talent had on set. Last step was to apply “corrective smoothing” to the model to correct some bumps that inevitably form as a result of the mocap warping.

As I work on the mocap data and refine it, I will be posting more updates. Stay tuned for more… including a singing frog! That will require facial motion capture. I will be using a technique that I invented myself, and I will describe it in a future post.

If you have any questions, don’t hesitate to reach out to me at contact@newflightdigital.com.